Monday, February 28, 2011

NGOH HIANG - Hokkien Meat Rolls

28 Feb 2011
I tried this recipe for the first time.  It was good but it would be even better if I had added dried mushrooms for more flavor and some carrots for color.

Anyway, here are the pics to the steps.  The quantity stated is for 2 recipes so you can reduced to half if you don't need to make this much.  I can make 8 rolls out of this, exactly with 1 pack of the bean curd skin which cuts into 8 pcs.

I bought the fish from the fish market and it was actually prepared ready to be made into fish balls.


The ingredients have to be well mixed together. My friends suggested to beat the meat (like preparing the meat for meat balls) before adding the other ingredients.  However, I just had everything in together and I kept folding them till they were very well mixed and the texture was firm.

Now prepare the bean curd skin:
1)  Cut the bean curd skin into roughly 30cm x 25cm pieces.  My pack came in 2 large sheets and I cut them into 4 equal pieces for each sheet so I was able to have 8 pieces which was just nice for 2 recipes.

2)  I washed my bean curd skin by just dipping them into a basin of water few times and lay it out on a strainer.  I washed them piece by piece and I washed 4 pieces for use first so they won't get dry during the making process.
Lay out the bean curd skin and scoop an amount (depends on your preference of size) onto the bc-skin.

  
You will need to dap some cornflour along all the sides and briefly over the skin so it will stick together later.
Shape it out like a roll on the bean curd skin.

Dap some cornflour at each end of the roll to ensure the bean curd skin will close over the roll.

Here is a video clip which I asked my daughter to take while I was making the rolls. 

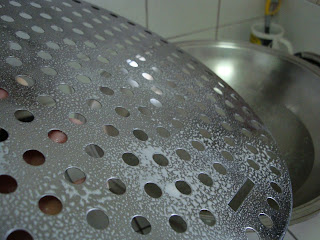
Now you can prepare your steamer.  I used my wok as a steamer and I sprayed some oil over the steamer plate before placing in the wok.  Then place the rolls on the steamer plate; cover the wok and steam over medium heat for 10 min.  Then take them out to cool on a rack.  You can freeze the rest for later, if you have more than enough for one meal.   They are ready to be served as Steam Meat Rolls or you can cut into bite pieces, coat them with cornflour and deep fry them.

I avoid deep frying as much as possible so I pan fried them over medium heat till lightly brown.  Then cut them into bite sizes and ready to serve.

They go well with chilli sauce or my home-made chilli paste.

GETTING TOGETHER

28 Feb 2011
I invited these ladies to my place for a dinner fellowship.  One of them brought her husband and another one brought her husband and daughter, so my husband didn't end up being the thorn among the roses.  It was sort of potluck because a few them prepared a few dishes to bring with them.

Dinner Menu:
Soup - old cucumber
Caramel Pork Belly
Ngoh Hiang (Hokkien Meat Rolls)
Hot and Spicy Chicken Feet
Green Vegie
"4-Big-Sky-Kings" (translated from its Chinese name) - consists of 4 kinds of beans
Pickled Cucumber with Carrots


Due to travelling I have missed their fellowship for a long time and it was really a happy-get-together tonight.  So happy chatting away that I forgot to take more pics.  There were scenes of them preparing the fruits before the meal; and clearing the tables after the meal; and washing up the dishes too.  Then I made a pot of Taiwan Mountain Tea, but when I suggested Starbucks there was a good response.  So I brew Starbucks coffee for those coffee lovers and brought out my nice dark chocolate (from a Canadian friend).  Haha...it was a night of temptation; and good chatting over tea and coffee.....not forgetting, sharing the recipe for my Hot and Spicy Chicken Feet with them too.  Yes, they loved it and I got good comments on the Ngoh Hiang (Hokkien Meat Rolls) too! 

After 9pm someone's sleeping time was due so they had to dismiss.  On the way out, one of them offered to have the next get-together at her place!  So this is a good start and good thing should continue...Praise the Lord!

Sunday, February 27, 2011

HOT AND SPICY CHICKEN FEET

27 Feb 2011
I am cooking this recipe for the 3rd time....1st time was to try it out and 2nd time was for my children during the CNY.  I have adjusted some of the ingredients to my preference and I am preparing this for tomorrow's fellowship dinner with some cell group ladies.

This recipe suits me well as I was looking for one which does not call for deep frying and I was so glad to find this.  Below are pics to the cooking steps but I forgot to take pics in the beginning so I missed the first few steps.  Anyway, I believe these are clear enough for anyone to follow. 

 
Rub the chicken feet (1 kg) with kosher salt and let stand for 10 mins.  Rinse with cold water.
Then blanch them in hot boiling water for 5 mins. Drain and cool.
Dry fry for 10-15min till lightly brown. (You can first oil your wok with a little oil about 1 Tbsp).  Set aside.

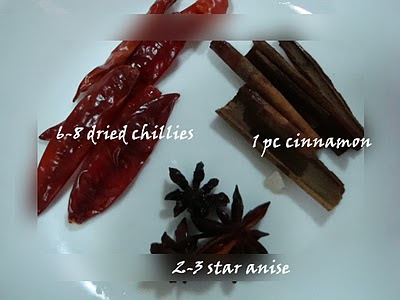
Fry the ginger and shallots in some oil (about 2 Tbsp) till lightly brown, then add in the chillies, cinnamon and star anise to continue frying till fragnant.


Pour the chicken feet back in to stir fry with the ingredients in the wok.  Then add in the following sauces.


Add in the sugar (I like using rock sugar which gives a nice flavour but I ran out of stock, so I use brown sugar instead)

Stir fry till the sugar melts and the chicken feet is well mixed and coated with the sugar and sauces.

Now add in the ShaoXing wine (I put in wine instead of the 1/3 cup of water which is really personal preference of taste).  I kept the wine which I used  to soak the chilled pork leg in, during the CNY, for dishes like this Chicken Feet and Pork Trotters.  Yes, you can use this same recipe for pork trotters and they taste "yummily" delicious!

 
I transferred the chicken feet to my Kelomat pressure cooker in order to cook faster....15 min at 2nd ring.
(If you are just using the wok, you will have to constantly check on the gravy and either you add in more water or the wine to simmer the chicken feet till they are soft.  The last time I cooked in a wok, it took me 1 and 1/2 hr over medium heat and I had to add in extra 2 cups of water and 1/2 cup of the wine.)

 
Wait for the ring to go down completely before opening the lid of the pressure cooker.


Ready to serve.  It's yummy but don't make this a frequent dish :)


Tuesday, February 22, 2011

Taro Cake

22 Feb 2011
I have got 2 yam in my fridge which I have almost forgotten about.  I have to get rid of like 1/4 of it as it has already started to soften and rot.  I am glad I still have 650 gm left to make 1 recipe of taro cake.


A)  Boil the yam cubes in 2 cups of water over medium heat so the water still remains after the yam soften. 

B) Fry the garlic (I just run out of shallots so I use garlic instead) and shrimps with some oil till fragrant, then add in the mushrooms to fry....then the pork till they are well mixed.
Add in the shredded yam to fry till all the ingredients are well mixed together.
Pour in to (C) mixture.


C) Mix these ingredients well together (make sure there is no flour clumps)
Pour in (B) - the fried ingredients.
When (C) is ready, pour in right away and stir immediately to mix them together. 
When done, put to steam for 1 hour or so. 


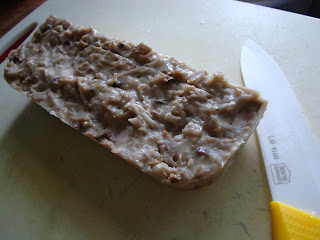
Now it is ready to be cut into pieces ......


......to be fried lightly in pan with little oil.  If you are using a non-stick pan you do not need much oil.  I just spray mine lightly with oil which comes in a spray can.


Pan fry the taro cake pieces till lightly brown and crisp.


You will note that the yam cubes are still in good shape and they give you a good taste of yam.
It will go well with chilli sauce or the Crispy Dried Shrimp paste of Cosway.


Monday, February 21, 2011

PICKLED GINGER

20 Feb 2011
I bought some more ginger. I wasn't able to find any young ginger when I was out shopping so I just got the best I could.  I reboiled the solution which I used previously and make another new portion of the sugar solution as I have more than enough ginger for one recipe. 

So here are the pics with the  ingredients.  This is a recipe for 250gm of young ginger.


I used bigger sized rock sugar but it took a much longer time to melt because I forgot to break it down to small fragments. It is better to use the CRYSTAL BROWN ROCK SUGAR, which is in finer form and melt faster so the solution won't dry up so much.


 Bring this ingredients to boil till the sugar dissolves.


Leave in the fridge and it will be ready for consumption after 3 days.